Connect WordPress
Create a revocable WordPress Application Password, verify the REST API, and make your self-hosted site ready for direct Tallpine publishing.
Tallpine connects to WordPress's built-in REST API. You do not install a Tallpine plugin, deploy a receiver, or share the password you use to sign in to WordPress. WordPress has included Application Passwords since version 5.6.
Publishing is public: an authorized Tallpine delivery creates or updates a public WordPress Post. Finish editorial review in Tallpine before you publish.
Before You Begin
Confirm all of the following:
- Your site runs self-hosted WordPress 5.6 or newer and has a public HTTPS URL.
- The core REST API is reachable at a URL shaped like
https://journal.example.com/wp-json/wp/v2. - You can create or edit a WordPress user that can edit and publish Posts and upload Media.
- A security plugin, reverse proxy, or host is not blocking authenticated REST requests or removing the
Authorizationheader.
See WordPress's official REST API authentication guide and Application Password reference for the WordPress-side behavior.
The WordPress screenshots below use a documentation account and hide every credential. Your theme, plugins, and WordPress version can make the Admin UI look slightly different.
1. Prepare a Dedicated WordPress User
- In WordPress Admin, open Users and create a dedicated publishing user, or choose an existing non-personal integration user.
- Give it the lowest role that can edit and publish Posts and upload Media. A standard Author role often has these capabilities, but custom roles and plugins can change them.
- Record the exact WordPress Username. Tallpine uses this with the Application Password; do not assume the display name is the login name.
Do not use an administrator merely to make setup pass. If a limited user fails verification, repair that role's Post or Media capability instead.
2. Create the Application Password
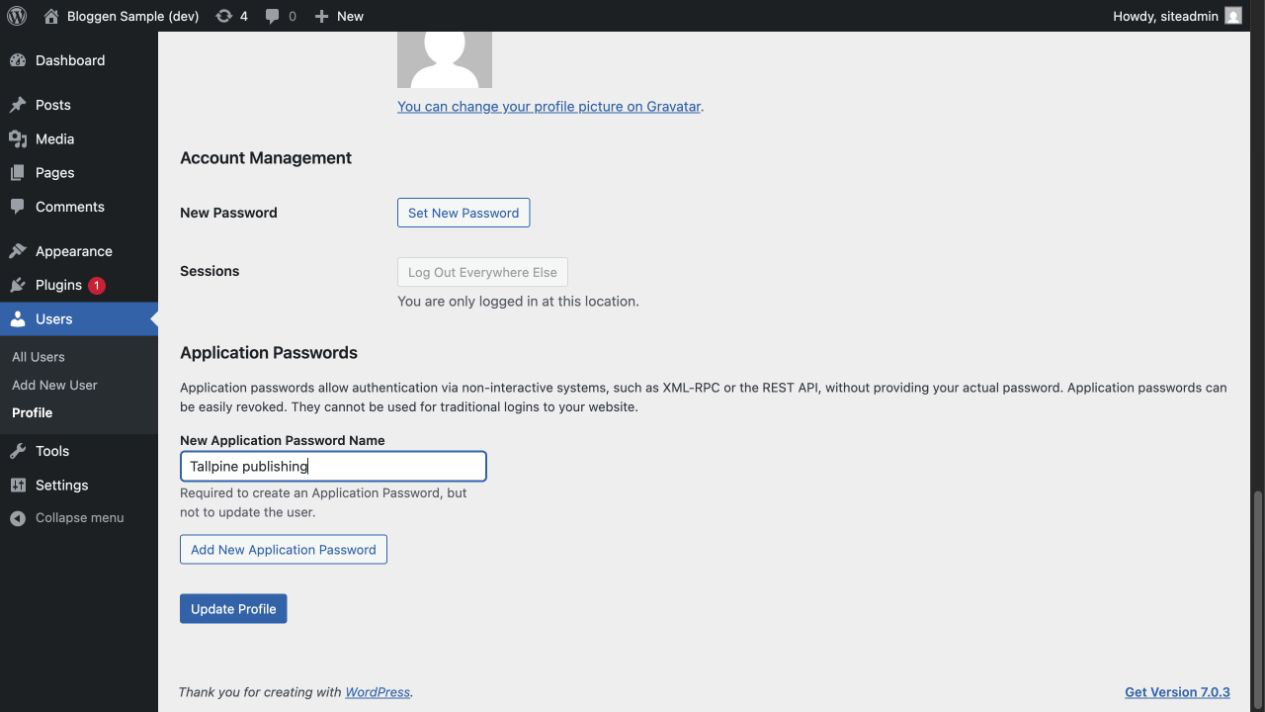
- Sign in as the publishing user and open Users → Profile. An administrator can instead open that user from Users → All Users.
- Scroll to Application Passwords.
- Enter a recognizable name such as
Tallpine publishingand choose Add New Application Password.
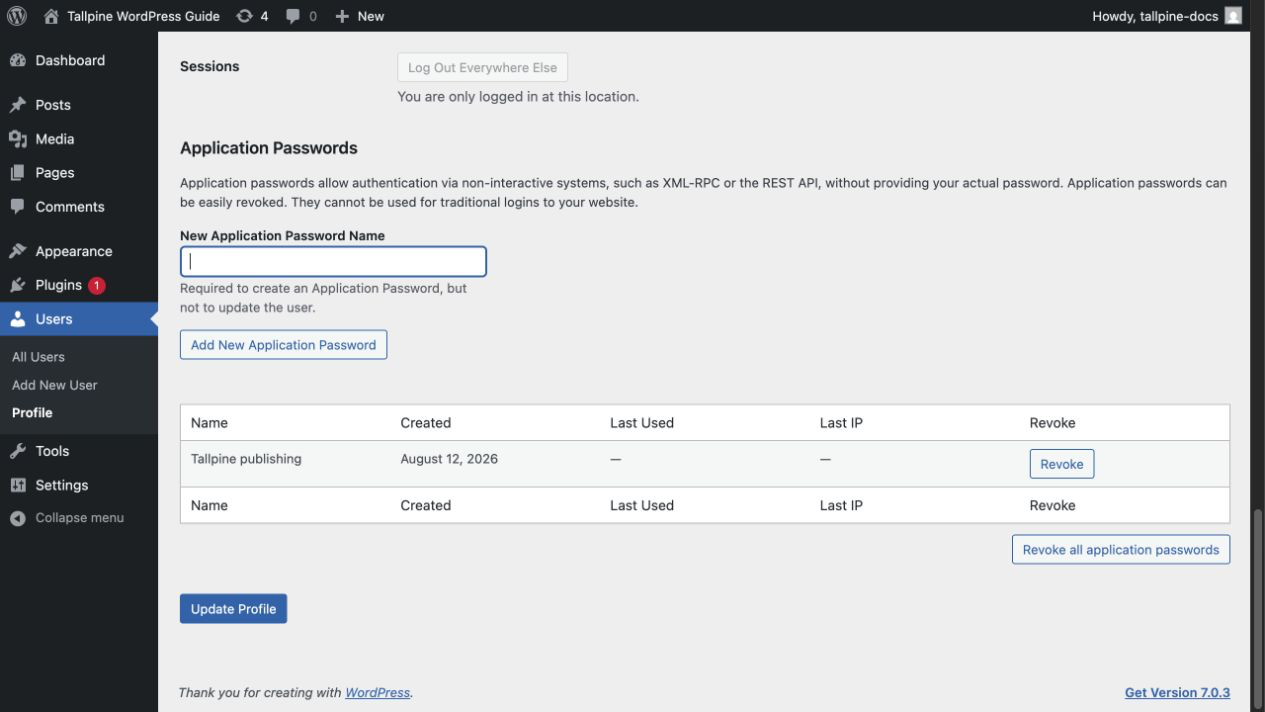
- Copy the generated password immediately. WordPress shows the full value only once.
- Save it in your password manager under the WordPress site and user. Do not paste it into a ticket, screenshot, source file, or shared note.
- Leave the user's normal sign-in password unchanged. The Application Password is a separate credential that you can revoke without locking the user out of WordPress Admin.
3. Enter the Connection in Tallpine
- Open the matching Tallpine Site.
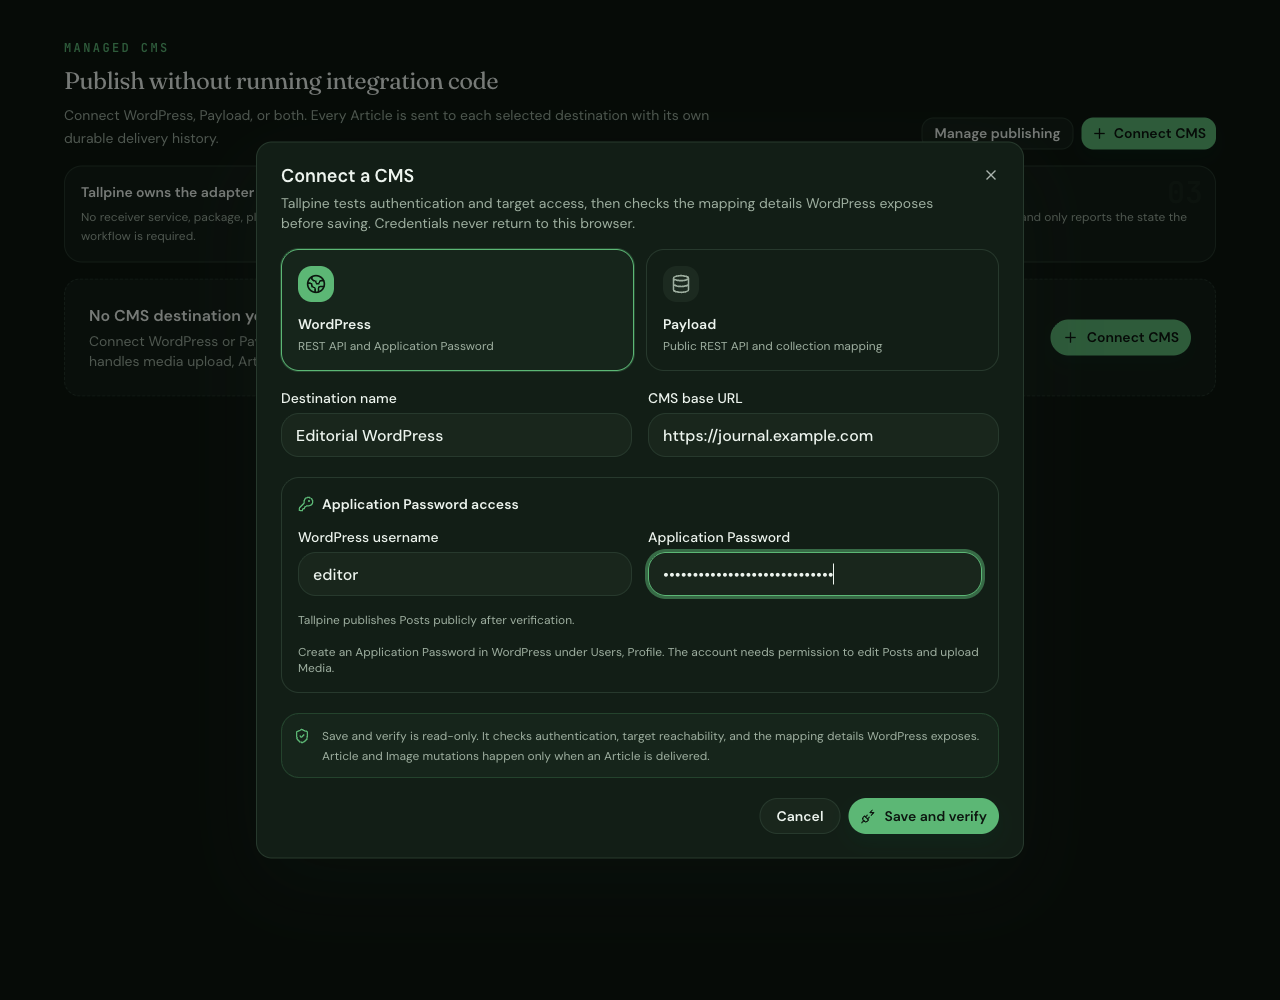
- Open Connections, choose Connect CMS, then choose WordPress.
- Enter a destination name that tells editors which site it reaches.
- Enter the WordPress root URL, such as
https://journal.example.com. Do not add/wp-admin,/wp-json, or a trailing API path. - Enter the exact WordPress username and paste the Application Password. Spaces in the displayed password are acceptable.
- Choose Save and verify.
4. Confirm the Verified Connection
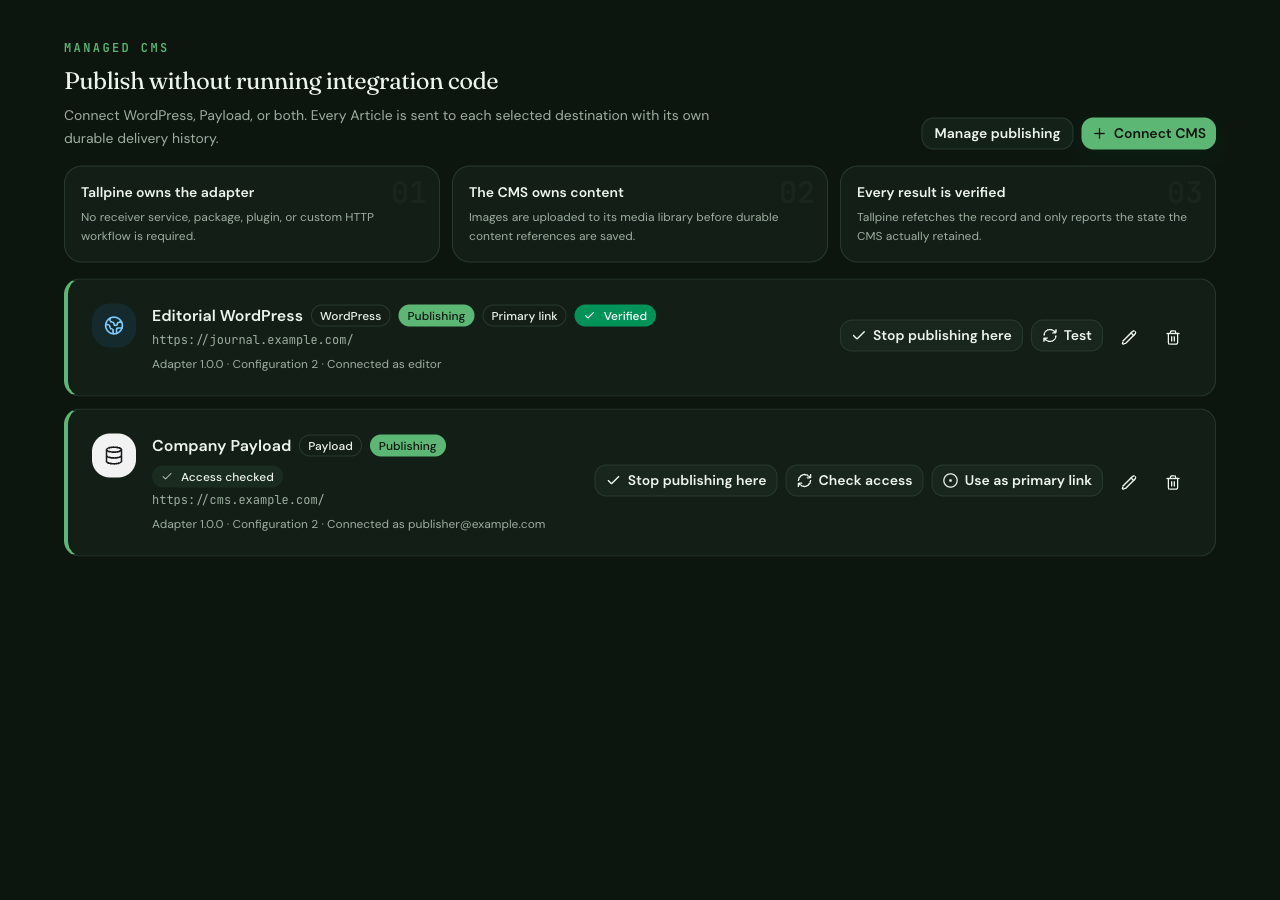
- Confirm the saved card shows Verified and the expected WordPress username.
- Reload the Connections page and confirm the destination is still present.
- If this is the Site's main destination, choose Use as primary link. Do not replace another primary link until you intend to change future delivery.
- Open WordPress Posts and Media and confirm the read-only verification did not create anything.
5. Make the First Delivery Deliberate
Verification is read-only. The first authorized delivery is the first time Tallpine uploads real Image bytes, creates or updates a Post, refetches the remote record, and confirms that WordPress retained it as published.
- Use an approved Article, not placeholder test content.
- Confirm the title, slug, excerpt, body, Featured Image, and public URL in WordPress after delivery.
- Tallpine writes core WordPress Post and Media fields. It does not configure arbitrary plugin fields or SEO-plugin metadata.
- If you need write proof without public impact, connect a separate staging WordPress site first.
Continue with Publishing & Queue to set the daily delivery time or publish selected ready Articles now.
Troubleshooting
- Application Passwords is missing from the profile
- Confirm WordPress is version 5.6 or newer, the site uses HTTPS, and a plugin or host policy has not disabled Application Passwords. Check the profile of the exact user you plan to connect.
- WordPress returns 401 or rejects the credential
- Use the exact username and the Application Password, not the normal login password. Recopy or regenerate the credential. If it still fails, ask the host to preserve the Authorization header for HTTPS REST requests.
- The account lacks permission
- The user must be able to edit Posts, publish Posts, and upload Media. Check custom role and capability plugins before widening the account to administrator.
- The REST schema cannot be verified
- Open the root
/wp-json/wp/v2route without credentials and check that corepostsandmediaroutes are exposed. Review security plugins, proxy rules, and host-level REST restrictions. - Images fail during the first delivery
- Check the user's Media capability plus the site's upload size and MIME rules. Tallpine supports up to six PNG, JPEG, WebP, or GIF Images per Article, 10 MiB each and 60 MiB total; WordPress can impose tighter limits.
- The connection worked before a credential or domain change
- Edit the destination, replace the changed value, and choose Save and verify. Do not submit a duplicate delivery while one is still queued or publishing.
Security Checklist
- Use a dedicated publishing user with the lowest working role.
- Use HTTPS for the WordPress URL.
- Never give Tallpine the user's normal sign-in password.
- Keep the Application Password out of screenshots, logs, and chat.
- Revoke the named Application Password in WordPress when retiring the Connection or after any suspected exposure.
- Verify again after every URL, role, plugin, or credential change.
For delivery recovery and support details, see Troubleshooting & Support.